Showing posts with label kitchenomically yours. Show all posts
0

Litratong Pinoy #101: Wala na (Gone)

cadets_cake

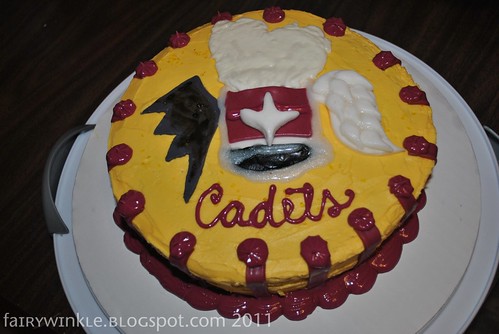
A family friend whose son plays in the prestigious Cadets Marching Band requested that I bake a cake for him for when he performed at the New Meadowlands Stadium in Secaucus, New Jersey last Sunday night (August 7th).

They have such a huge following that fans of all ages and types, even perhaps those on social security disability, were there to watch and cheer and marvel at their musical coordination and choreography on the field.

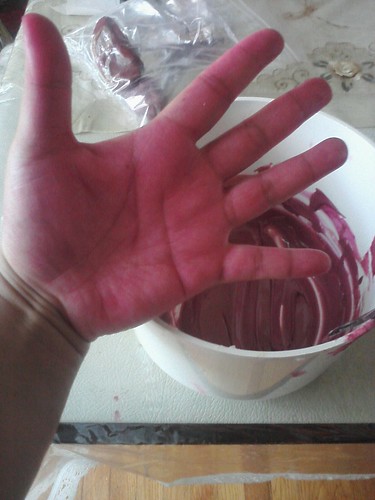
Their official colors are maroon and gold, so I set out to use those colors for the cake. The most challenging part was making the maroon color, as the burgundy icing color that I have looked fuschia at first. That meant adding more amounts of the color to the icing and the fondant. The stripes on the cake and the centerpiece marching band hat with angel and demon wings are the only fondant elements, the rest is icing. This is what burgundy did to my hands:

Caught Burgundy-handed!

Like I massaged a maroon Oompa Loompa!

In their "Tour of the Champions" performance, their theme was "Between Angels and Demons," hence the angel and demon wings on the cake. Sadly, I didn't get to watch their show myself, but the cake did reach the intended Cadet. After their awesome performance, the maroon icing has melted throughout the night, but made it happily into several stomachs. It was all GONE! An apocalyptic disappearance!

Natunaw man sa kakahintay ng kakain sa kanya, naubos din daw agad yung cake na ginawa ko para sa marching band na Cadets. Yun nga lang, konti lang silang naki-share dahil maliit lang ito. Pero, pinagpuyatan ko ang paggawa nito!
5

Build-A-Bake

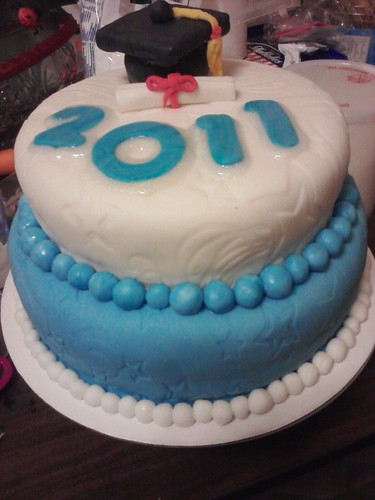
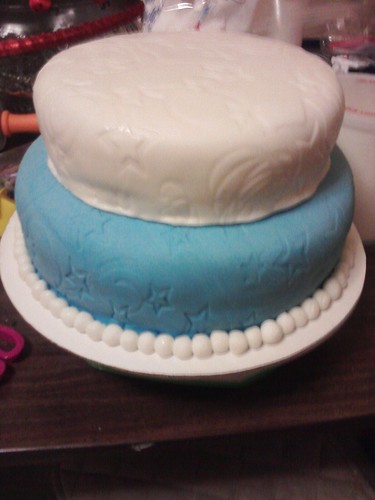
My two-tier graduation fondant cake with star imprints. No sleep!

 I am proud to present to you my first fondant cake which I built and designed all by myself!

This was a Graduation Cake I made for my cousins who graduated from high school and middle school. I stayed up ALL NIGHT to finish this cake! Rolling out the fondant and imprinting it with stars were the trickiest parts, while kneading the fondant and tinting it with colors were the most time-consuming.

But the result was definitely worth the trouble and received a lot of praises from potential future cake clients!

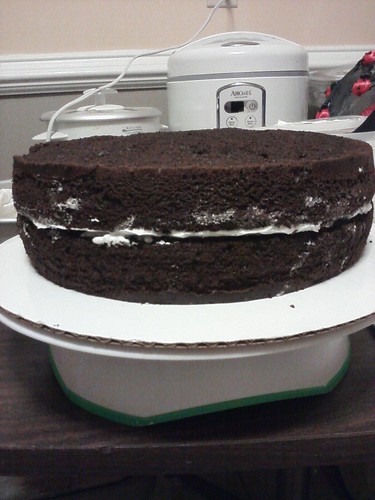
It all started from the chocolate cake base which I leveled and cut in half to put icing in the middle. This is a 10-inch cake which serves as the bottom tier. The top tier is an 8-inch cake of the same flavor.

Stacking the bottom layer of the hopefully 2-tier choco cake.

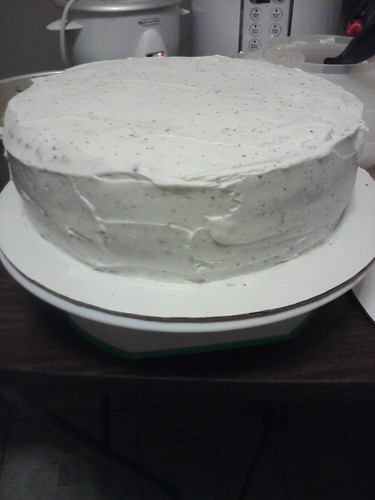
Next, I covered the entire cake with icing which would also serve as the "glue" for the fondant.

New Message

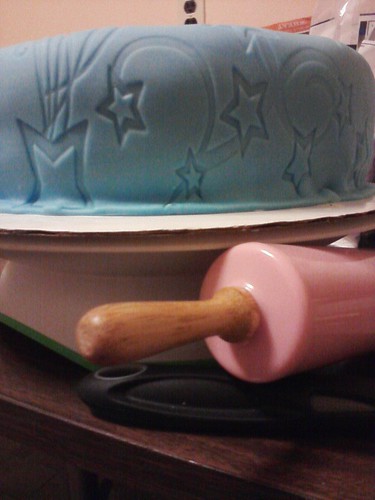
I used ready-made Wilton fondant which I laboriously kneaded and rolled flat with the new plastic rolling pin I got. Kneading fondant was like massaging a giant stress ball that sticks to your hands. I would rub vegetable shortening on my hands and mat to keep it from sticking to the surface.

Let's roll!

The star imprint was magical! Like applying tattoo to your cake!

Took forever to get the star imprint on the fondant just right.

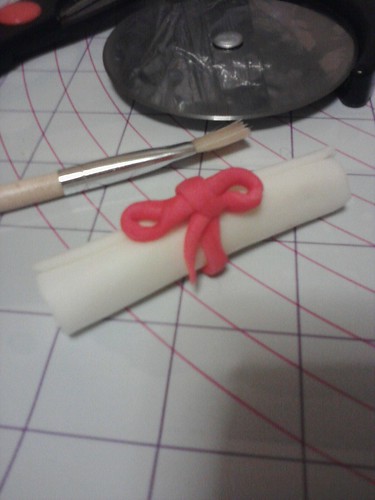
With cakes, it's all about the details. Hence, I madea little diploma with ribbon out of fondant, too.

My little fondant diploma!

I used corn cob skewers as wooden dowels to support the cake tier. What's fabulous about fondant is that it gives your cake a clean, polished look and it doesn't smear or smudge in case you touch it, unlike regular icing.

Stacked the two tiers together! Finishing touches next!
I had the sudden urge to talk to my friend via conference call services when I finished the cake, but it was already 7AM and I haven't slept a wink!
4

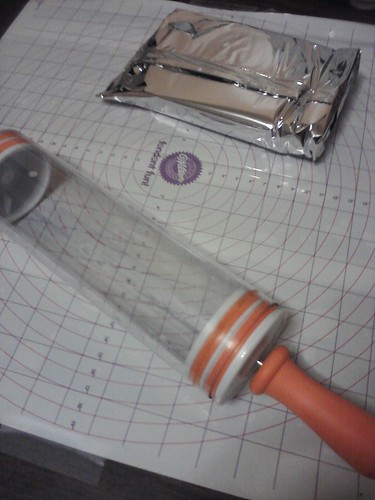
Rolling Pin-and-Cookie Cutter Container-in-One!

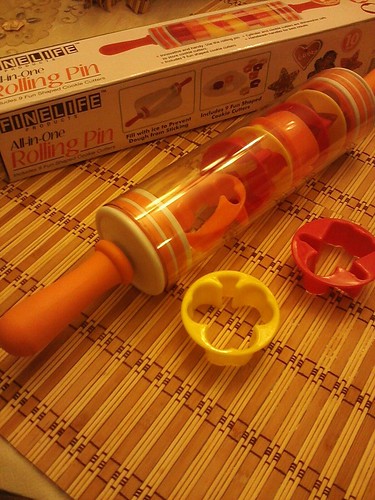
Plastic rolling pin with 9 cookie cutters inside! Just $7.99 @TJMaxx!
Have you ever experienced finding exactly what you're looking for at the exact time you need it? That's what happened to me tonight while browsing at one of my favorite stores, TJ Maxx. See, I'm about to make my first Graduation Cake for my cousins' Graduation Party this Sunday and I want to buy a big rolling pin for the fondant. I ALSO need to buy star-shaped cookie cutters as I want to incorporate star shapes on their cake.

And this was the amazing product I serendipitously found! It's exactly what I need AND THEN SOME! A big rolling pin with 9 cookie cutters inside...one of them being a star shape! Wow! Thank you so much, Dear Universe! You read my mind and blew it away at the same time! (Only a fellow baking geek would understand how I feel.)

If there were wireless security cameras in that store, they would probably have seen me do my secret happy dance. It was only $7.99! And I was actually planning on getting an expensive Wilton-brand rolling pin and a start-shaped cookie cutter. This fabulous find saved me money, time and gas!
6

Patriotic Pugs (Plus a Cake!)

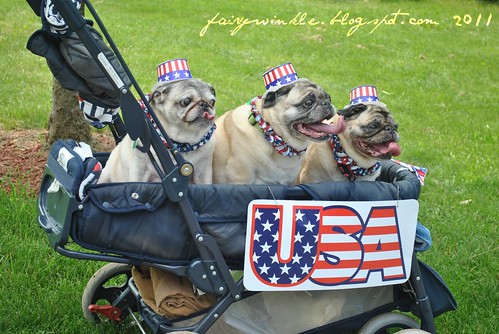
patriotic_pugs

Wishing my fellow Americans a Safe, Spectaculiar and Special Fourth of July! These patriotic pugs were a scene-stealer in our town's Memorial Day parade last May, so I photographed them! How can one ignore these cute costumed canines?

And this is why I'm sharing this favorite photo to celebrate Photo Cache's 5th Blogoversary as well!

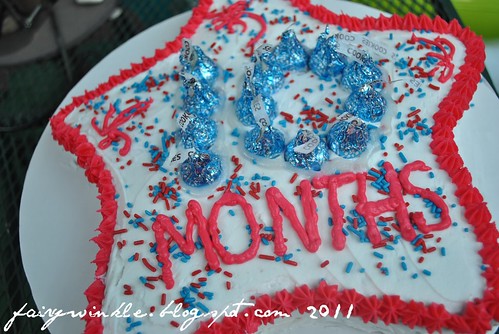
fireworks_cake

And in my efforts to continue the self-invented tradition of baking a cake each time my baby niece turned a month older, I humbly present my star-shaped red, white, and blue cake for her tenth month! This was hurriedly iced and decorated in about 30 minutes, and I was grateful for the Hershey's Kisses wrapped in blue foil that we had a bag of! I sprinkled blue and red over the white icing and drew random "fireworks" with the red icing (which I wished was redder).

Yup, my niece is a 10-month old Baby Firework!
4

Ice Cream Cupcakes!

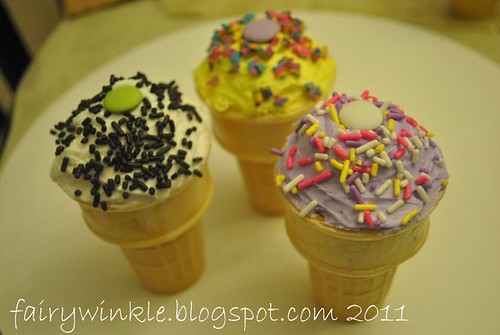
triocone

It's the First Day of Summer! And one of the sweet treats that can beat the heat is ice cream! But wait! These are "imposter" ice cream!

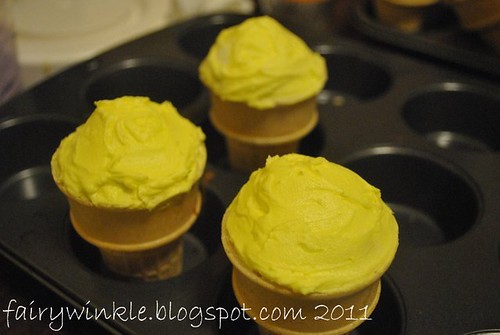
Baking cupcakes directly onto ice cream cups was a first for me. But this was actually my second "commissioned" cupcake creation by the same client who happens to be a family friend. It's for her kid's End-of-School Party. I hope they enjoy eating them!

yellowcones

What's so cool about ice cream cupcakes is that it won't melt, you can basically have your cupcake and eat your ice cream cone, too; and there's nothing to toss afterwards, making it mess-free! What happens to your mouth and face while eating it is completely a different story, though.

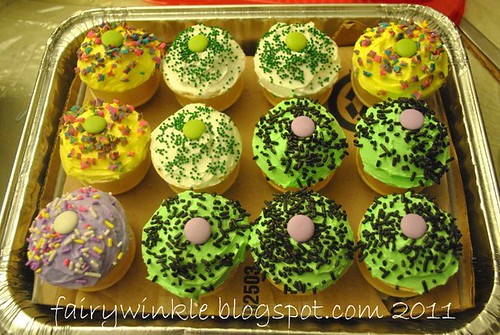
conetray

The downside: placing them in trays and keeping them upright! Extra challenge: delivering them to client with zero to minimal  damage! I cut holes through a cardboard which thankfully already had round markings from its being a carton for canned goods, I believe. Then I carefully placed each ice cream cupcake, all twelve of them, in the tray.

I gotta get some new HP ink cartridges to print some of my baking achievements for posterity!
0

Just Beat It!

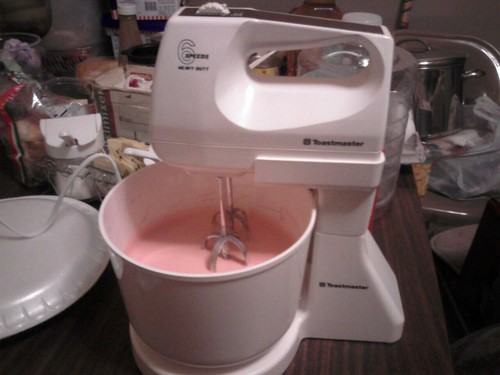
Breaking In The Mixer My Mom Got From Secret Santa Years Ago. Luvit!
It was a huge relief when my mom unearthed this unused stand mixer that she got as a Christmas gift many years ago. As I've been mixing batter after batter a lot more lately because of my cake decorating classes and a few special occasions, this was a much-needed kitchen tool upgrade from the tedious egg beater and hand mixer.

What I love about it is that when you switch it on, the bowl spins in its place while the metal blades spin in the opposite direction. And it comes in six different speeds!

All this sweet, sugary stuff has me wondering about oxyelite pro side effects at the back of my mind, but I can't help having fun with these cakes!
2

Balloon Birthday Cake

ballooncake
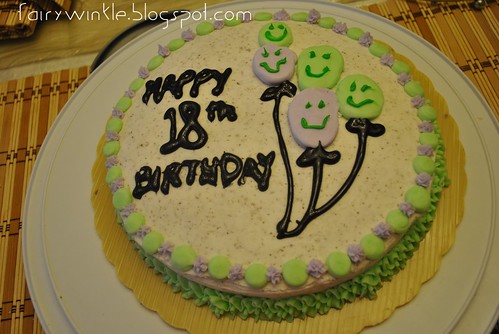
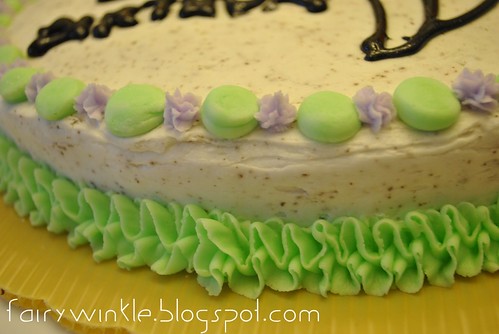
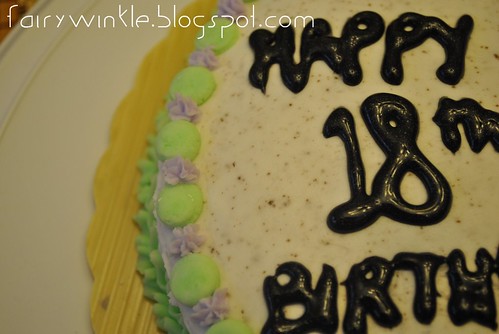
My cousin turned 18 this month and I eagerly created this birthday cake for him, applying the latest decorating techniques I learned in class using "dimensional icing."

Yes, I did say it was for a "he." I wasn't able to achieve a deeper shade of the green and purple as I had hoped when mixing the icing colors, so it ended up in these pastel hues instead. My cousin didn't mind!

Those are balloons with smiley faces, by the way. You can tell how frantic I was to finish the cake in time to bring it to the Chinese restaurant where we would gather for his birthday dinner that night.

cakeborder
I used three different decorating tips to put the borders. An expert cake decorator would probably sneer at the cake crumbs that are visible on the icing. We were taught that it means the frosting I applied wasn't thin enough, thereby allowing the cake's surface to stick to the spatula as I spread the icing.

I'm a beginner, cut me some slack! Or better yet, cut me some cake! Save the Sensa for later!

icingwriting
The lettering was done with Wilton Sparkle Gel icing tube. It adds instant sparkle to any cake! Am proud of my cake decorating improvement!

Oh, and I just signed up for next month's Wilton course: "Flowers and Cake Design!" That's one course away from the "Gum Paste and Fondant" course!
4

Fishy Friday

fishcake

Last Monday's cake decorating class had us bringing our own baked cakes to be decorated. An amazing cake tool I discovered from this class is the "cake leveler" which lets you slice off the unsightly hump on newly baked cakes. You get a flat-surfaced cake by using this simple tool.

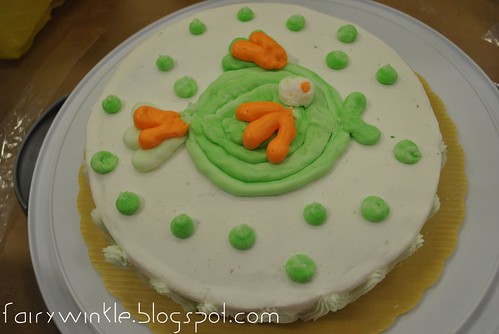
Our course booklet contains model cakes to copy. Another cool trick we learned was transferring traced patterns onto your cake from paper, such as this fish design I chose. Instead of using tracing paper and pencil, we used parchment paper and gel piping. We also learned how to smooth out the icing on the cake using parchment paper and a spatula for a polished look.

I only have one icing color, green, so I borrowed my classmate's orange icing bag. On this cake, we applied the "dimensional decorating" technique for icing with a Wilton #12 icing tip. It lets you do round and elongated icing shapes on your cake.

Pardon the crude look of my cake. I'm just a beginner, after all.

It's green because of St. Patrick's Day. I call it my "Lepre-Cod Cake." (Leprechaun, get it?) My fish is so Irish, it even has orange fins. Flaming orange fins.

Our cake decorating instructor encouraged us to take photos of our finished cakes not just for posterity, but as requirements for when we wish to become Wilton instructors ourselves later on. Something to put in the portfolio, perhaps. Luckily, I brought my DSLR and snapped away. I even took photos of my Filipina classmate's cake because she didn't have a camera. Just in case we want to be cake decorating instructors in the future. But presently, for blogging purposes for me. I can see myself doing cake after cake until I get old enough to qualify for a Medicare plan.

KG had asked in a comment on a previous post if I could share the recipe for the buttercream icing which uses meringue powder that we had used for the class. I must warn you, though, that since it's stiff, it will give your arms quite a workout mixing it. Unless you have a nifty stand-alone mixer. Here it is from our Wilton Basic Cake Decorating Course booklet:

Buttercream Icing Recipe (Stiff consistency, makes 2 1/2 cups)

1 cup solid white vegetable shortening
1 teaspoon Wilton flavor (Vanilla, Almond or Butter)
7-8 teaspoons milk or water (I use water)
1 lb. pure cane confectioner's sugar
1 tablespoon Wilton Meringue Powder (*Allergy warning: may be eliminated if allergic to eggs)
Pinch of salt (optional)

Cream shortening, flavoring and water. Add dry ingredients and mix on medium speed until all ingredients have been thoroughly mixed together. Blend an additional minute or so, or until creamy.

To turn this icing batter into thin consistency, add 2 teaspoons of water for each cup of the stiff consistency icing mentioned above. Therefore, you will add a total of 5 teaspoons to make it thin, that is, soft.

The thin icing is the one used to frost the surface of the cake, while the "medium" consistency is used to add decorative icing, such as the fish design and dots you see on my cake.

Decorator icing is like modeling clay, only you squeeze them out of icing bags with specially-shaped tips. Wanna try?

7

Christening Cupcakes

cupcakepeep

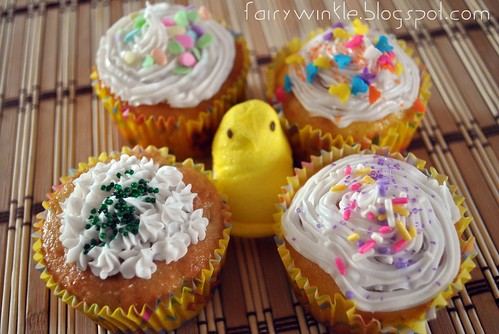
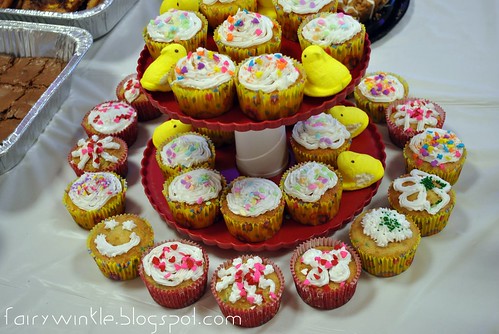
There's a story, a celebration, behind every cake. These are the cupcakes I made for my baby niece's christening last Saturday. I only had one muffn pan to bake these cupcakes on, so I stayed up late baking batch after batch and adding swirls and Spring-themed sprinkles on top of each cupcake.

I had originally planned on using the Peeps marshmallows as cupcake toppers, as if they're sitting on a nest of frosting. I ditched the idea last minute and used the Peeps as decor instead.

cupcaketower

I was excited to use the cupcake tower I had bought on clearance from Walmart after Valentine's Day. For a mere $5, this tower came with a lid, 6 icing bags and 3 decorating tips.

Last night's dinner at a Chinese restaurant had me pulling two fortunes from just one fortune cookie. The first said "You are gifted in many ways." The other said "You will be unusually successful in business." Could the heavens be telling me to open up a cake business? Baking franchises, maybe?

I'm so glad I signed up for the Wilton Basic Cake Decorating course this month. Best $17.50 I've ever spent for myself so far. Only two more Mondays until the course ends. But we're already given another discount coupon for the next courses if we're interested.

I see fondant in my future!
6

Cake Decorating 101 (Soft vs. Stiff)

Last Monday was the first of the Wilton Basic Cake Decorating classes that I had signed up for this month at our local Michaels store. One can only watch so many cake shows until the longing comes for a live, hands-on tutorial. There's 15 of us in the class, but I think one person was absent when our names were called. There was a pregnant lady in maternity clothing next to the instructor; there were moms and grandmoms. There's only one other Filipina in the group: a tall, long-haired lady whose name is as quintessentially Filipina as they come: "Laarnie."

The first question we were asked by the instructor was: "Is there anyone in here who hasn't tried baking?"

Nobody raised her hand. Everyone looked at each other. I think you have to at least baked once to prepare yourself for a course like this. After all, our cakes/cookies are our canvas for all this icing art we're about to learn.

"Good! So that means I can skip that page on the lesson!"

On my left was this young, teenage-looking girl who slouched in her seat, hugging her cake equipment container while the class went on. Every five minutes or so, her father would come up behind her to hand her some materials bought last-minute, then a notebook, then a water bottle. It looked like she bought everything in the syllabus, including the "optional" ones. I only brought the essential items. I decided not to bring icing coloring yet as it was "optional." Working with white icing was fine for now. I had brought the cheap food coloring in liquid form, thinking it was a suitable substitute. I found out later on in the class that it wasn't, because liquid food coloring affected the consistency of the icing, ruining its stiffness, so the cheap alternative stayed hidden in my backpack.

This teenager was too busy fussing with her tools while the instructor was talking that she didn't hear how the icing bags were supposed to be assembled. She turned to me for help and I did. The instructor cheerfully promised us that by the end of the course, we could decorate cakes as gorgeous as the ones pictured on the course booklet. The woman at the end of the table mumbled rather grimly, "Uh-huh, good luck to me." The other lady near her chuckled," Think positive!"

The first lesson involved making buttercream icing from scratch. That's actually a misnomer because it doesn't really contain butter. It was a revelation for me to know the difference between frosting (the ones readily available at groceries) and icing (the one bakers use to decorate cakes). The latter is stiffer because it has meringue powder! That's the magical ingredient! And that's something that's not readily available at groceries.  Each time she adjusted the consistency of the icing, she passed the bowl around so we can plunge the spatula into it to feel it.

"And remember, once it becomes soft, you can never go back to stiff," the instructor said. Somehow that came off differently at the back of my mind.

I was a little lost when she explained the measurements because I hate math, but everything's on the booklet anyway.

Our first decorating technique was using the star tip on cookies. The mom on my right brought her own baked sugar cookies which were shaped like flowers. Mine were store-bought, artificially-flavored orange cookies. Holding the bag properly meant making sure the tip does not touch the cookie's surface, and then you give the bag a firm squeeze, then lift.

I'm glad I've had some practice with that particular icing tip with my giant heart-shaped sugar cookie, only my first attempts there looked like tiny Hershey's Kisses with a swirly body. The perfect star has to be shorter. When making them side-by-side, there shouldn't be any holes in between.

That was easy for the first technique! For our next class next week, we have to bring an 8-inch cake to be decorated with icing we've created ourselves. Thank God for 50%-off coupons that let me buy the pricey can of meringue powder!
4

Ziggy-Zig Cake!

Remember that wildly catchy song by the Spice Girls "Wannabe?" Part of that song's lyrics inspired this blog title, "I really, really, really, really wanna Zigazig Ah! (Whatever that means!)" Ziggy-Zig Cake, voila!

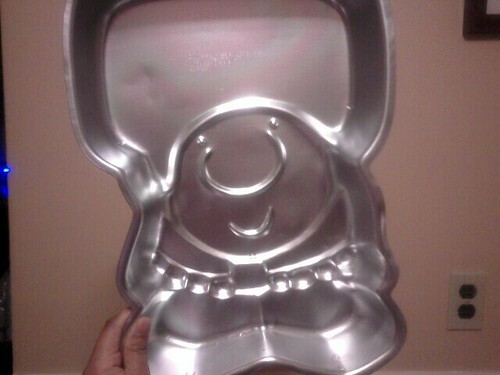
This is my latest baking experiment with a Wilton Ziggy cake pan I acquired from Ebay. It's so vintage, it's literally as old as I am! I love this comic strip character. He has changed over the years, but I prefer the way he originally looked.

My Ziggy Wilton Cake Pan Is As Old As I Am!

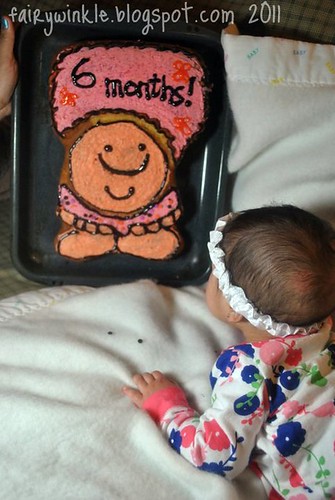
I made this Ziggy cake especially for my baby niece's 6th month. I'm proud of myself because it's the first time I used different colors of icing on the same cake. It's best to have white frosting on hand and a set of food colors. I scooped a certain portion of white frosting and mixed it in separate bowls with different food colorings to come up with orange and pink. Here is my niece admiring my oven-baked obra maestra:

zigcake

Since Spring is just around the corner, we dressed her up in a flowery garb. Someday she might wear hip hop clothing if her dance-crazy uncle and aunt decide to teach her how to bust a move or two.

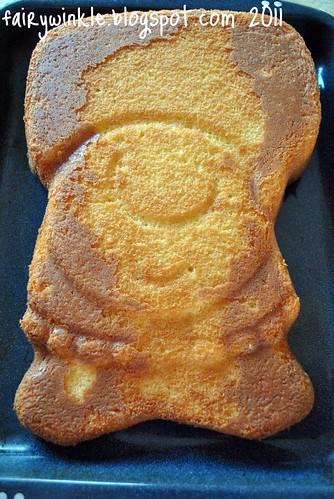
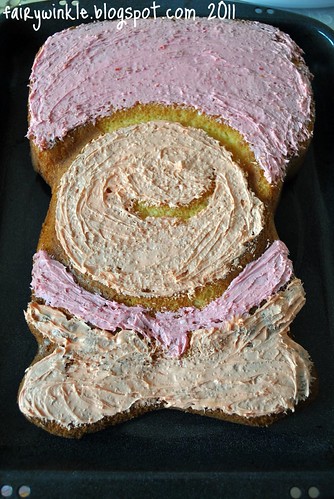
I used a butter-flavored cake batter but used vegetable margarine in the mix. This was how the cake looked like straight out of the oven:

barecake

Now smothered with colored frosting (pink and orange):

icing

I drew in the outlines and facial features with Wilton sparkle gel icing, then sprinkled his shirt with round candy confetti, then outlined his thought cloud with Wilton two-colored tube of decorating icing.

ziggycake


So would you really, really, really wanna Ziggy-Zig bite?
6

My Achy Bakey Heart

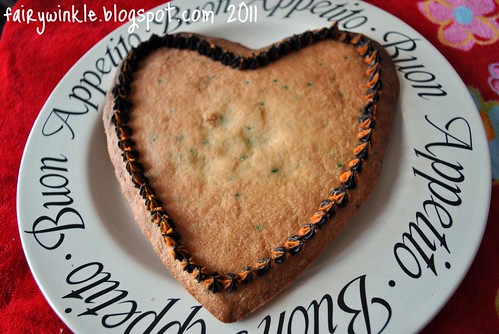
heartcookie

I tested my new Wilton heart-shaped cake pan by making a giant heart-shaped sugar cookie. When I spread the dough into the pan, I left about an inch of space around it so it would be easy to extract the cookie from the pan later on. Since cookies are baked on ungreased cookie sheets, it helped that the cake pan was non-stick.

When the baked beauty was done, I tested my Wilton tube of dual-colored icing (purchased after Halloween, thus the orange and black combo) which conveniently came with decorating tips. I used the star tip to dot the edges of the cookie. The space in the middle is big enough to write your own message such as the eternal "Happy Birthday."

To give you an idea of how big the heart cookie was, here's a photo of my hand holding it straight out of the oven (after it cooled, of course):

Baked My First Giant Heart-Shaped Sugar Cookie!

The tiny spots you see are the green candy sprinkles I mixed with the batter prior to baking.

You know what bums me out as a budding baker, though? It's when I create these confections and take them to parties with diabetophobic adults who abstain from sweets yet would eat the sticky rice dessert that's on the table.

It's called "Dessert Discrimination." But don't tell my heart, my Achy Bakey Heart!
5

Apron Porn!

aprons
Bitten by the baking bug--that's me. You may have noticed my previous posts on my baking baby steps. Right now, I'm mostly using boxed cake mixes, but I do eventually want to bake from scratch. I understand that when you want to be really good at something, you have to learn the nitty-gritty basics. I imagine instant cake mixes must offend the Gods of Cookery, but I must start somewhere easy. I would eventually want to make ube (purple yam) cake from scratch, because it's a favorite flavor for Filipinos.

At this stage, I'm more interested in decorating cakes with icing. So interested I am that I enrolled in a Wilton Basic Cake Decorating course next month at our local Michael's Store. It'll be every Monday in March for two hour sessions. The first class will be about decorating cookies. Ultimately, I want to be flawless with fondant...but that would be another Wilton course. Or perhaps I can learn it on my own!

With the baking bug comes this aching for aprons which I sought to satiate with Ebay. I was seduced by the vintage ones--the ones not available in department stores. An apron is an important kitchen apparel which when worn should inspire you to create something delicious!

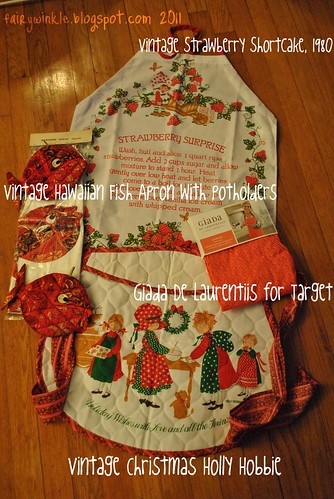
So my apron loot consists of these: an authentic Strawberry Shortcake (in pristine condition, hard to believe it's vintage)--because I'm a sucker for Strawberry Shortcake; a set of Hawaiian fish half apron wih matching fish-shaped potholders (vintage but unused in original packaging, made in Honolulu); a quilted Holly Hobbie Christmas half apron, also vintage; and last, a more recent Giada De Laurentiis for Target full-sized apron, because when I first saw her cooking line at Target, I wasn't crazy about baking or aprons yet.

My baked goodies will be in direct contrast to thermogenic fat burners, but I'm glad I have these lovely aprons to keep me inspired to bake!

Are you obsessed with something right now that inspires you?
6

It's Pan-tastic!

pan-tastic


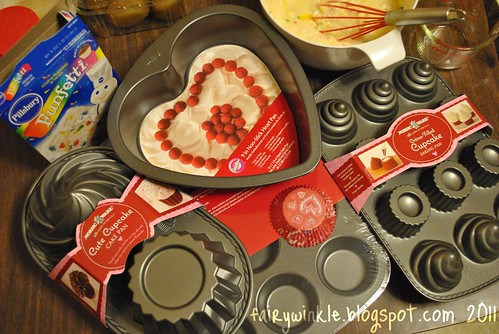
Post-Valentine clearance sales at Walmart just gave me a cake pan orgasm. The cake pans which simply had Valentine packaging were marked down to 75% off! Yes, that's a Wilton heart-shaped cake pan right there which cost only $2.25, but that doesn't mean baking heart-shaped cakes should only be for Valentine's Day!

I also got a muffin pan (also Wilton) which has its own pan cover (not seen in photo, it's underneath), a giant "Cute Cupcake" cake pan by Nordic Ware (lower left) which lets you put the baked products on top of each other for a supersized cupcake, and the swirl-topped cupcake mold (lower right, also by Nordic Ware) with hollow bottom so you can add your own filling inside! These three bigger pans only cost $4.50 each, original price was $18! I got all four pans for less than that amount!

Some of the cardboard labels even have cake recipes at the back, which I promptly cut and taped to my handy-dandy recipe notebook (which has a little cut-out of Giada De Laurentiis glued to the inner cover).

I was so ecstatic, I think I wet my pan...try. Haha. Just having a little pun with my pans!

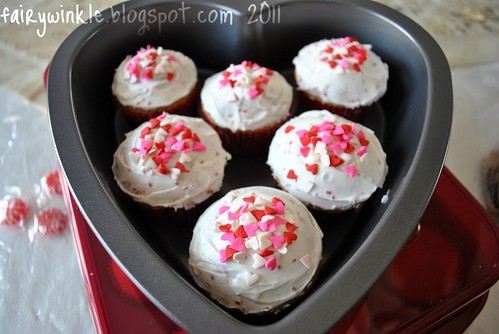
And since it's the third Sunday of the month, which means Filipino Potluck Sunday Mass,  I decided to bake Pillsbury Funfetti cupcakes with heart sprinkles. I used the new muffin pan with the heart-print cupcake liners (in photo above) which I also got on clearance. The heart sprinkles came in a little bottle I bought from Marshall's for $2.99. I had wanted to make the frosting pink or red, but I could not find my food coloring vials!

heartcupcakes


You're actually looking at two types of candy sprinkles on them. The tiny red dots are the sugar crystal sprinkles which I already mixed with the frosting prior to applying it on the cupcakes.

I also learned a cool trick with using frosting that has been stored in the fridge. It will naturally be stiff straight from the fridge, but I put hot water in a bowl and let the frosting container sit in it. The temperature will soften the frosting, like it was freshly opened!
 
And as always, the best ingredient I put in it was LOVE! The cake mix yielded two dozens of cupcakes, two of which were consumed at home, and the rest were gone by the end of the potluck dinner!
Sorry if the cupcakes distracted you from browsing hgh pills, but I just had to share my latest baking breakthrough. I baked these at past midnight, which means that if this were a movie, it would be "Pillsbury Saga: BAKING Dawn!"

Soon I'll perfect those sexy frosting swirls!
5

Life Is But A Cream (Frosting)

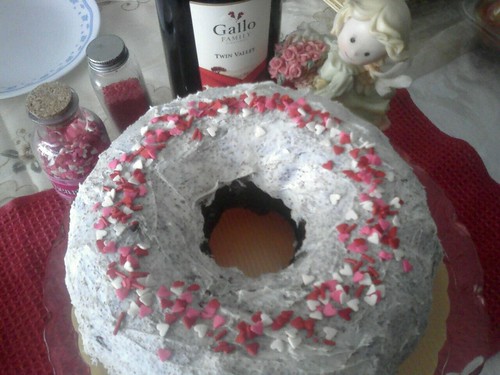
Devil's Food Bundt Cake With Heart Sprinkles

The Devil bakes Devil's Food Cake! I added heart-shaped candy sprinkles for Valentine's. I love my Bundt pan.

By the way, Happy Valentine's Day!

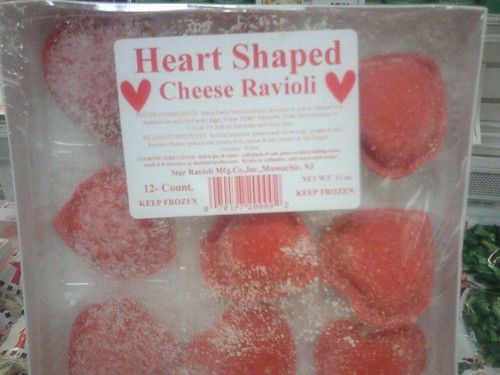
Mama Mia! Heart-shaped Ravioli!

Check out another heart-shaped item I found at the frozen foods section at our grocery! Heart-shaped ravioli! Do you think it's too...cheesy?

Red Velvet Cake Batter Is Red! Bloody Red!

A few days ago, I tried red velvet cake from Duncan Hines for my cousin's 21st birthday. I was careful not to splatter the blood-red batter!

Casino-inspired Cake For A 21-yr-old. Coz She's Legal!
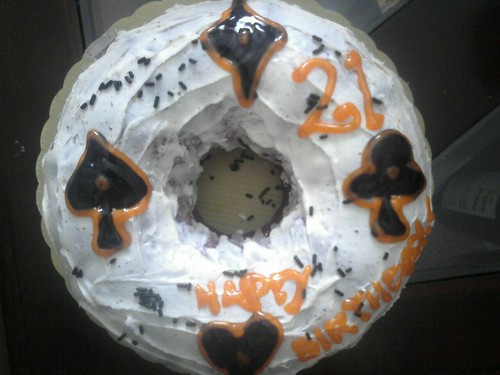
Since she's "legal" for all intents and purposes, I went with a playing cards theme to reflect casinos, so I drew the card symbols with gel icing. I know it looks crude but it's freehand and I wanted to finish it in time for it to be brought to New York where my cousin is. The black sprinkles look paltry because I couldn't get them to stick to the white frosting which has already hardened a bit.

And speaking of cakes, I signed up for Wilton Basic Cake Decorating classes in March at our local Michael's Store! I took advantage of the half-off tuition plus extra $5 discount offer.  I only paid $17.50 for four sessions! I'm taking my confection infatuation to the next level! This is part of my list of promises for a better me! Who knows, someday I just might be able to travel across the United States by land and consider things like motor home repair. For now, my sweet dreams are made of these!
3

Sacre Bleu! It's Chicken Cordon Bleu!

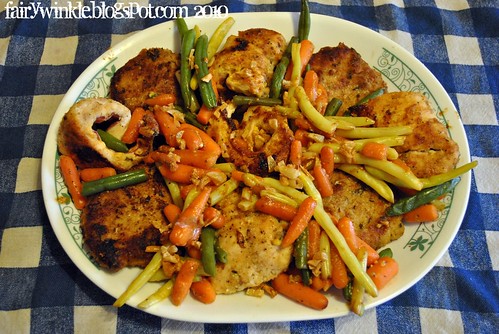
cordon

My recent kitchen achievement involved Italian Breaded Pork Chops and Chicken Cordon Bleu. Sounds very international, right? Best enjoyed while wearing a Lacoste shirt and a Fendi bag. Just kidding. No, both recipes were just yanked off the internet, as conveniently as many other information can similarly be obtained. They fit the ingredients found in the freezer and pantry, the most essential of which was the Italian-seasoned bread crumbs.

The breaded pork chops were coated with beaten eggs and seasoned bread crumbs and grated Parmesan cheese, pan-seared on both sides then further baked in the oven. For the Chicken Cordon Bleu, I admit I've always been intrigued by this French recipe and found out it's quite simple to make it. Like making a sandwich roll using chicken breasts as the bread and filling it with ham and cheese inside, then coating it with bread crumbs. Off it goes to the oven and voila! Only the actual cordon bleu or blue ribbon is missing to make it more official. The internet also told me that the name of the dish originated from the archaic way that chefs were recognized for exemplary culinary skills, which is by awarding them with blue ribbons. Hence the name "Cordon Bleu". Can't help but think that it rhymes with the celebrity name Corbin Bleu. Why would you name your kid closely after a chicken dish?


Buon Appetito/Bon Appetit!
2

Cauldron and Cat in Capiz

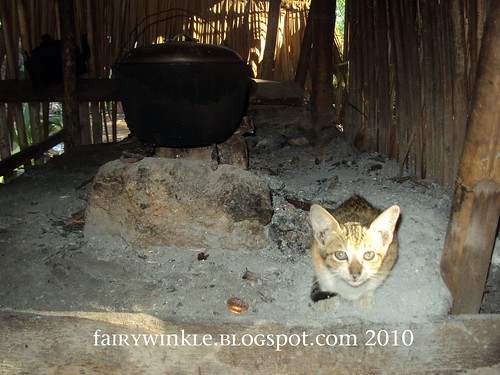
cauldron

If I translated the title to my native dialect, it would be "Kaldero kag Kuring sa Capiz"--still faithful to my tendency to alliterate with the "K" sounds.

This is what a traditional, countryside kitchen looks like in my rural hometown in Capiz. Cooking is a tedious process without an electric stove or gas range, but the wood-cooked meal tastes more hearty. Just make sure your cat doesn't enjoy your food before you do. They tend to hang about the kitchen like this one! Most people keep cats to protect their homes against rodents.

Surrounded by nature, people there can easily pluck their home-grown vegetables right from their backyard for an invigorating vegetable stew. There are unique veggie dishes that I can't find anywhere else except in Capiz, such as the long roots of the gabi (taro) plant locally called "takway" that are peeled, chopped, then cooked adobo-style.

It's no wonder then that the people would also look to their backyard or the nearby woods for home remedies for blackheads, stomach aches, or small wounds. When you live closer to the rice fields than your provincial town center, you have to make do with what Mother Nature gives you. It's just a matter of knowing what plant is good for what ailment.

Plants. vs. Zits!
5

Creepy Carrot Cake

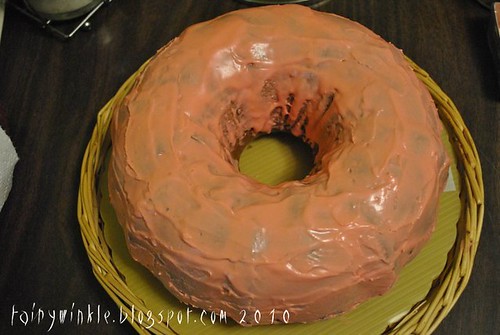
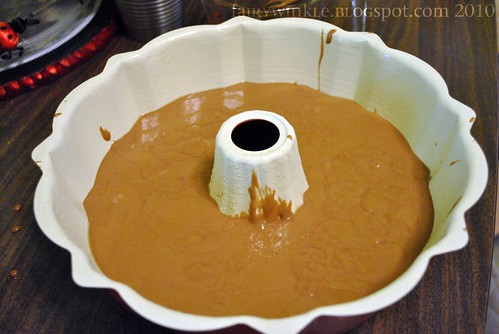
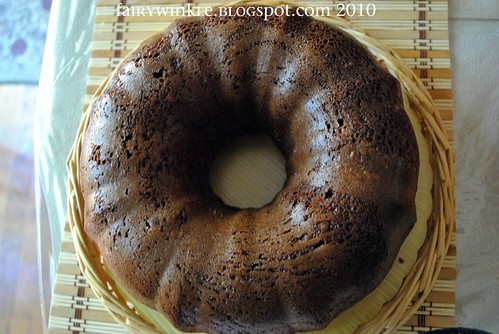
I started this little tradition of baking something special every time my baby niece turned a month older. On her first month last September, I baked fudge brownies for the first time. I can't believe I forgot to post it here. Yesterday, she turned two months old. It being October, I picked carrot cake to go with the orange theme of Halloween.

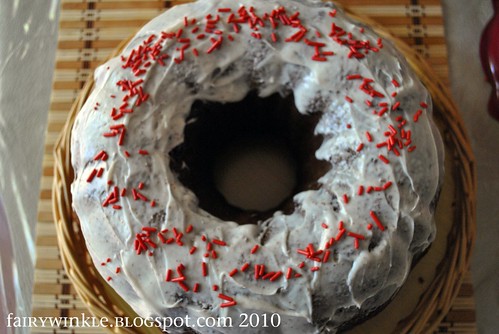
I used the same fluted cake pan for this recipe. I mixed red and yellow food coloring to make the white frosting turn orange. Instead, it turned salmon pink.

pinkfrost

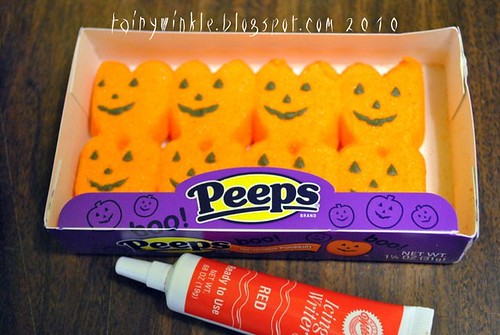
Slathered the salmon pink frosting all over the cake then sliced these little pumpkin Peeps to decorate the top.

pumpkinpeeps


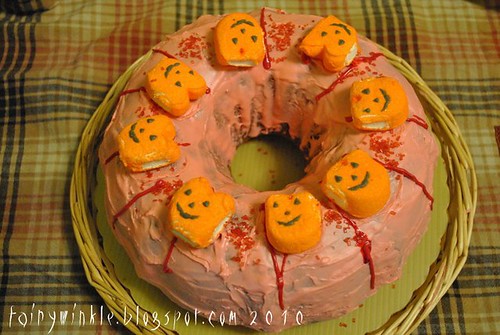
Then, I squeezed red icing alongside the Peeps for a blood-stained effect. Sort of like bleeding pumpkins. Also added red sugar sprinkles.

carrotcake

Creepy Carrot Cake! It's a sugar overload that might send you searching for the best fat burner after a significant serving(s). But hey, it's Halloween! It's sugar and spice...go have a slice!
5

The Cake Chronicles Continue

batterup


So I bought a fluted cake pan so I can enter the next baking level: from cupcakes to cakes! I used Betty Crocker German Chocolate cake mix for this attempt.

brown

With this pan, the cake looked like a giant donut! I was pressed for time since this was supposed to be a birthday cake the same afternoon I made it so I quickly dressed it up with white frosting and red sprinkles.

bigdonut

Supersized birthday donut! Homer Simpson would be drooling!

querico

It tasted moist and chocolatey sweet just like the box described. We brought the donut-cake to the Puerto Rican restaurant where we celebrated my sister's boyfriend's birthday. It was the same day that I had that freak accident. Good thing I wasn't carrying the cake when it happened. But I still enjoyed my Bacalao dinner that night!

Last night, I was watching "Wedding Cake Wars" on the Wedding Central Channel. They had a contest for mostly amateur cake-makers and the theme was "locations." You pick a famous destination and decorate your cake with that place in mind. One of the contestants was Carolina Lara, a Puerto Rican housewife with three kids who made theme cakes as a home business--she baked in her own home! Her cake was supposed to look like El Morro (which looks like the doppelganger of Manila's own Intramuros), that Puerto Rican landmark in Old San Juan (which I have a postcard of). Her husband was her assistant. She didn't win, but her efforts were inspiring. Another team with a gorgeous African Safari themed cake won first place.

Could fondant be in my baking future? Watching those cake shows make fondant-forming look like playing with modeling clay, except it's edible. Maybe if I try my hand at it, I could create some fantastic fondant cakes, too...especially for my niece's first birthday in August next year! That way, I won't just be sending the 1st birthday invitations, I'll be baking the cake too!
3

Ace of Cupcakes?

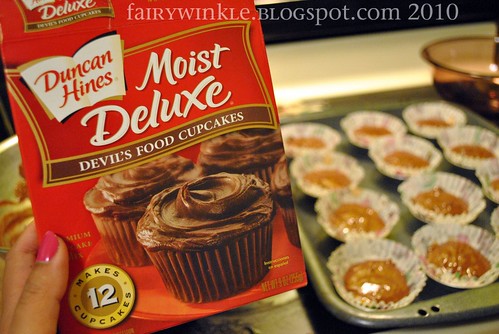
duncan

On Friday night, I decided to try my hand at baking cupcakes for the first time with this box of devil's food cupcake mix I got at the dollar store. I've always been intimidated by baking.

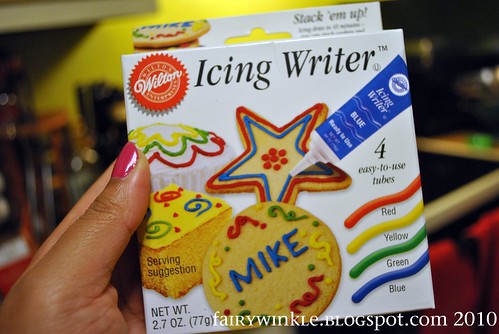
wilton

I also bought a set of icing writer tubes by Wilton from Target for $1.98. Cupcakes are essentially cakes in cup size that can still be written on!

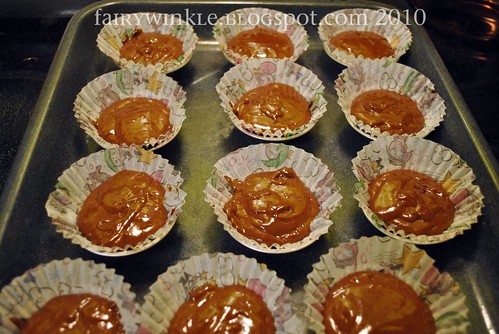
batterup

It was a simple mix of ingredients to create the batter: two eggs, some vegetable oil, water and the cupcake mix itself. I used Fairly Odd Parents-themed baking cups which I had bought ages ago because I had planned on trying to bake a long time ago.

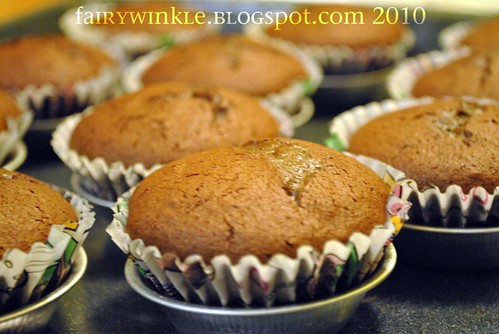
cupcakes


As per the box's instructions, I set the oven at 375 degrees then allowed it to do its magic for 24 minutes. This was the result!

frosting


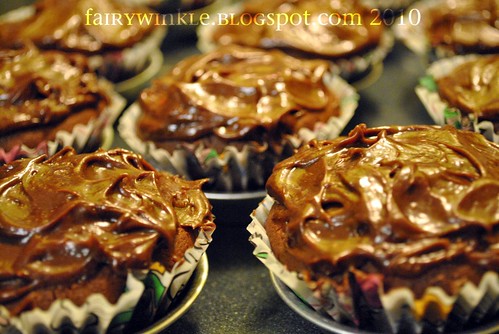
I added chocolate frosting on top of each cupcake. The can of frosting was also from the dollar store.


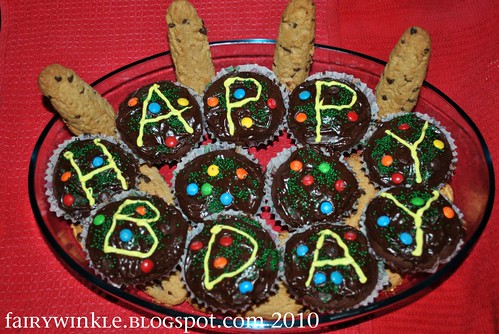
Then I wrote the birhday greeting with the icing writer and sprinkled each cupcake with green candy sprikles and M&M's minis. I added chocolate cookie fingers to complete the chocolate theme and this was my cousin's birthday cupcake! It was all gone as soon as the birthday candles were blown.

I'm no Betty Crocker, but these just might be my baby steps towards Ace of Cupcake-hood!
Related Posts with Thumbnails